
Paint by Numbers kits offer a relaxing, rewarding way to create your own artwork — but how you finish and display your masterpiece can make all the difference. One of the biggest decisions? Choosing between a framed or unframed canvas.
In this blog, we’ll explore the pros and cons of both options, walk you through how to frame a paint by numbers canvas yourself, and use a real example from our collection to show the transformation.
What’s the Difference Between Framed and Unframed Paint by Numbers?
Here’s a quick side-by-side comparison:
| Unframed Canvas | Framed Canvas |
|---|---|
| Stays rolled or pinned | Stretched flat and smooth |
| Edges may curl over time | Tightly secured, ready to hang |
| Needs external framing | Polished, complete finish |
| Easy to store | Easy to display |
Framed artwork looks more polished, professional, and gift-ready. It turns a simple DIY project into a gallery-worthy piece.
Unframed kits are great for flexibility — you can tape them to a board, paint directly on a flat surface, and frame them later. But if you prefer something ready to display, a framed version saves time and effort.
What's Included in Our Frame Kit?
If you choose a framed paint by numbers kit from our store, you’ll receive everything you need:
4 pre-cut wooden stretcher bars (50 x 40 cm)
Thumbtacks for canvas assembly
Hooks and screws for hanging

You can use a staple gun for extra tension (especially for larger canvases)
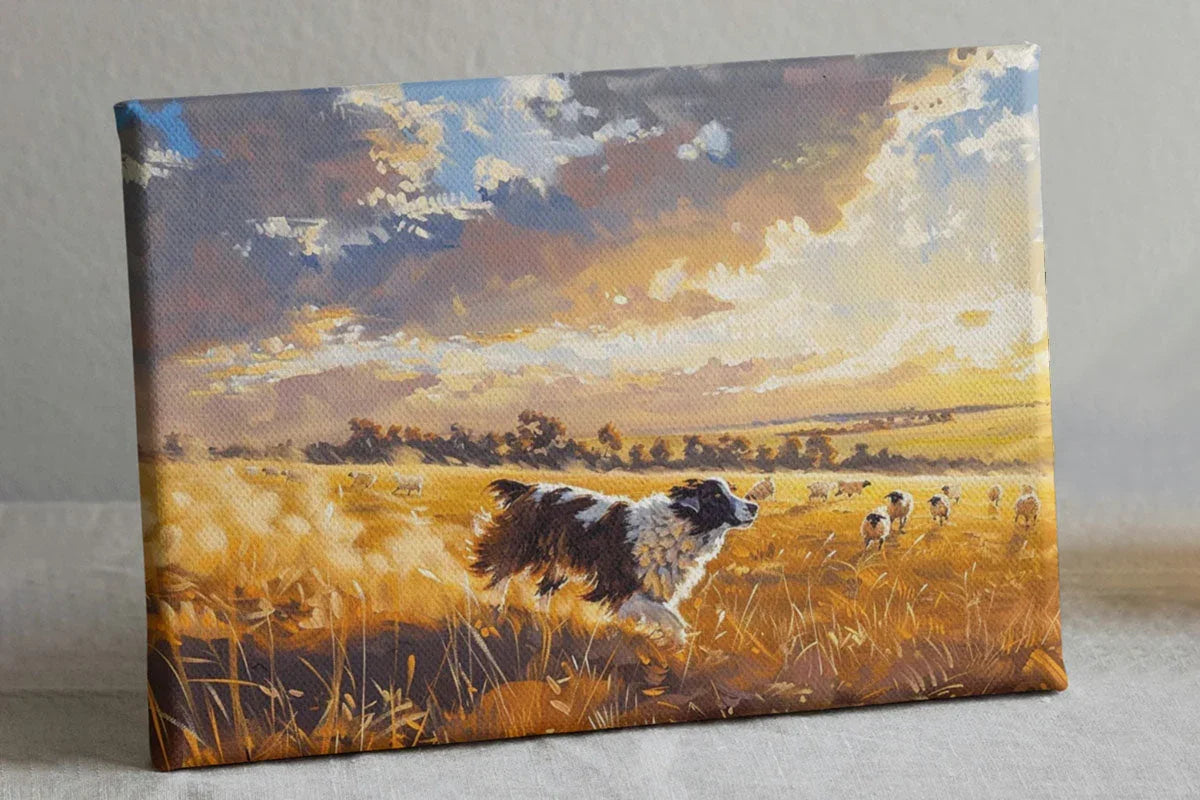
Real Example: How We Framed “Sheepdog at Sunset”
To help you visualize the difference, let’s walk through the framing process using one of our most popular kits: Sheepdog at Sunset – Paint by Numbers.

Total Canvas Size: 57 x 47 cm (22.5" x 18.5")
Painting Area: Centered
Frame Size: 50 x 40 cm
Wrap Margin: ~3.5 cm on each side
The extra canvas edges are designed to wrap around the frame, creating a clean, gallery-style look.
Step-by-Step Guide: How to Assemble a Wooden Frame
Step 1: Build the Frame
Connect the four stretcher bars by sliding their corners together. No tools needed — they interlock snugly.

Step 2: Lay Out the Canvas
Place the canvas face-down on a clean surface. Center the frame over the painting, leaving equal borders on all sides.
Step 3: Stretch and Tack
- Pull the canvas over one long edge of the frame and tack it in the middle.
- Do the same on the opposite side, pulling tightly.
- Repeat for the shorter sides.
- Keep checking the front to make sure it’s smooth and evenly stretched.
Step 4: Secure the Corners
Fold each corner neatly and secure it with thumbtacks or staples.
Step 5: Reinforce the Edges
Add more tacks or staples along the sides for extra security — especially useful before painting.

Should You Frame Before or After Painting?
Both options work:
- Before painting: Keeps the canvas taut and allows clean edges while you work.
- After painting: Prevents any accidental pressure or leaning on the frame during painting.
Choose whichever method fits your workflow best!
The Result: A Ready-to-Hang Work of Art
Here’s what our “Sheepdog at Sunset – Paint by Numbers” kit looks like after painting and framing — a vibrant, display-ready masterpiece that looks right at home on any wall.

Whether you’re painting for yourself or gifting to someone else, adding a wooden frame is a simple upgrade that elevates your finished canvas and makes the whole experience more enjoyable.
🖼️ Ready to Try It Yourself?
Explore our framed paint by numbers kits and see the difference it makes!

